


Manual Print Settings Screenshots
There are two ways to design barcode -
After designing barcode image, barcode generator – corporate edition allows you to print generated barcode. There are two printing modes – Pre Define label Stock or Manual.
Here we are going to discuss about how to print barcode using manual print option.
There are different wizard of manual printing via barcode settings or barcode designing view.
Click on print icon from tool bar, print window will be appeared as shown in below screenshot.
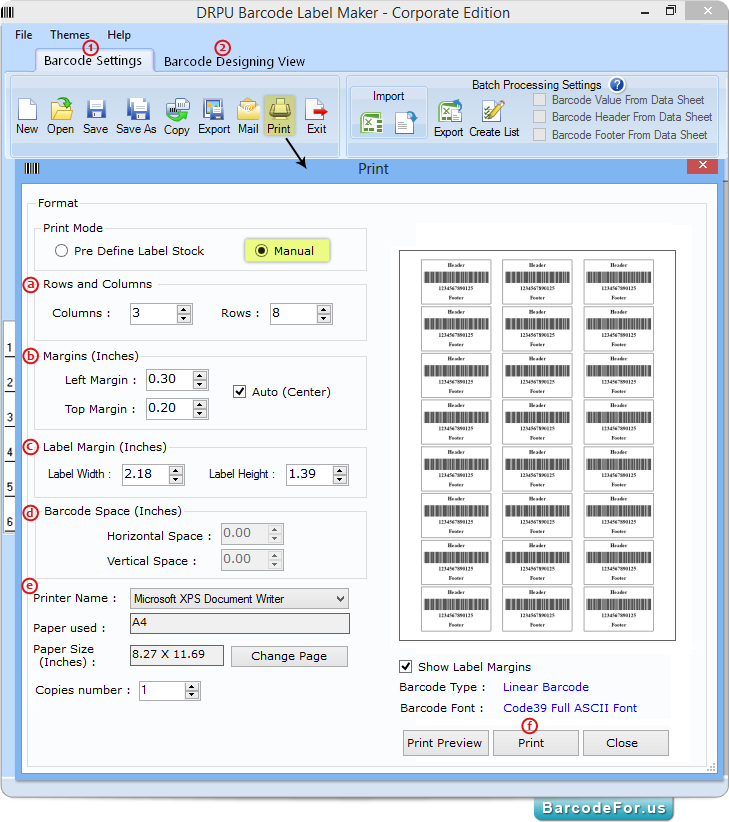
Choose Manual print option,
a Set rows and Columns,
b Adjust left and top margins (Auto center option is also available),
c Set Label margin (Width and Height),
d Set barcode space (Horizontal and vertical) if required,
e Select printer accordingly,
f Then Click on “Print” button to start printing designed barcode.
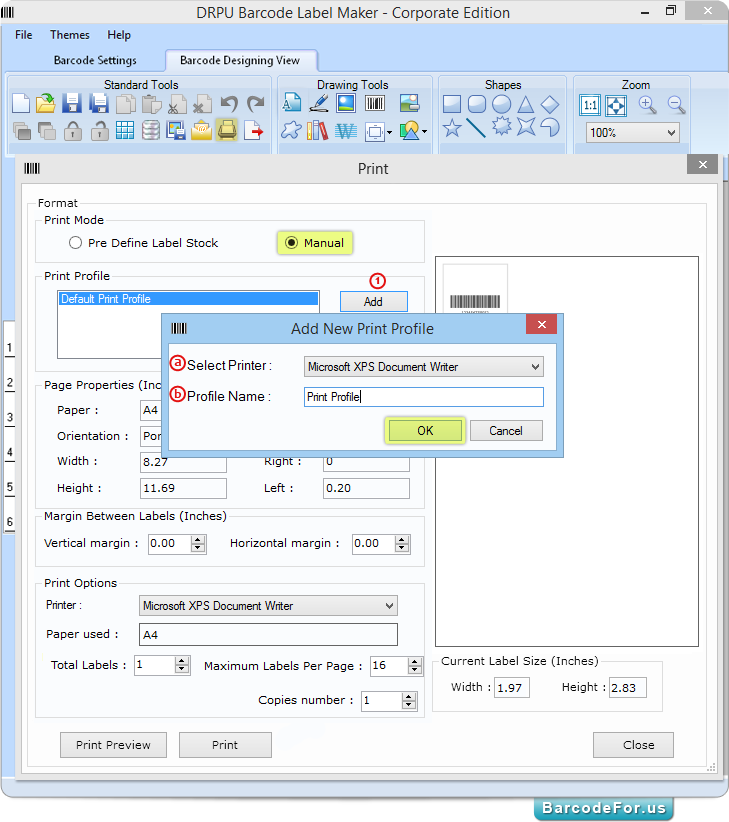
Enable manual print mode, Click on 1 Add button to set page properties. You can also have option to edit your previously saved print profile (page properties).
Add New Print Profile window appears, a select printer, b enter profile name then click on “Ok” button.
After clicking ok button, page setup window will be appeared as shown in below screenshot.
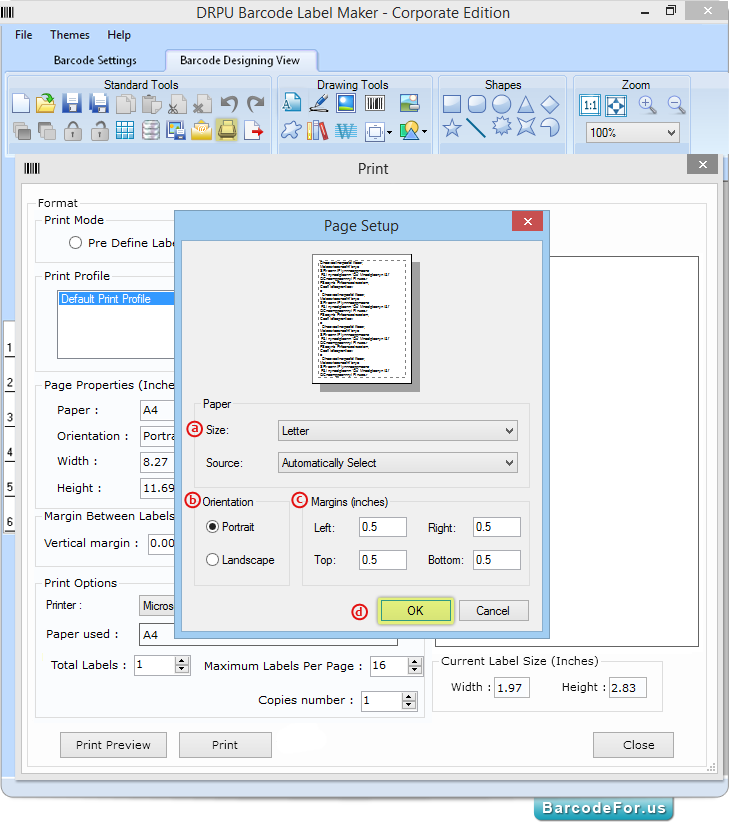
In page setup window, select following option
a Select paper size (A4, Letter, A4 extra etc.).
b Orientation (Portrait or Landscape).
c Set Left, Right, Top and bottom margin.
d Then click on “OK” button.
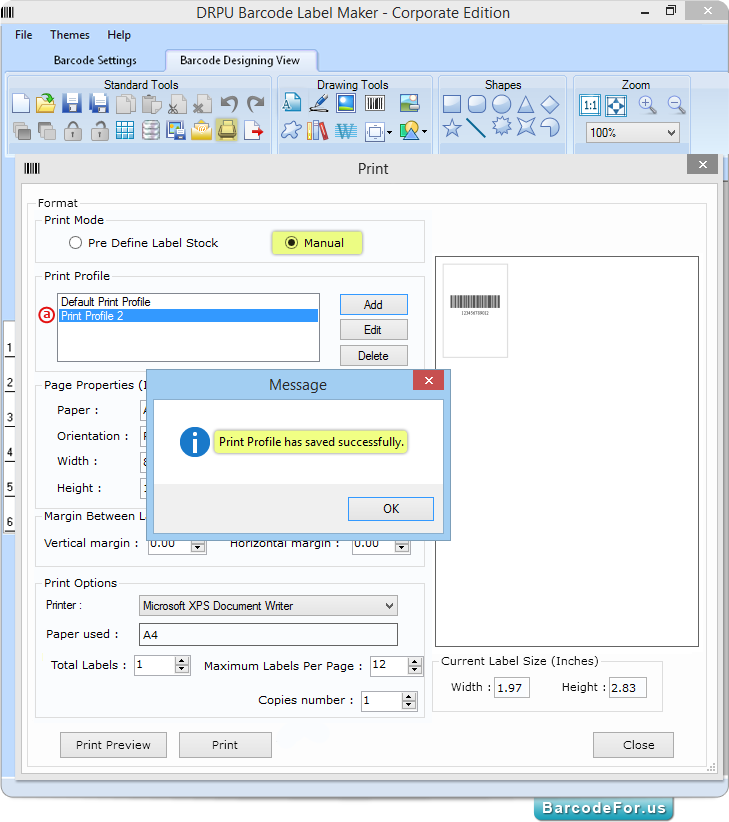
After clicking “Ok” button, confirmation message “Print Profile has saved successfully” window appears.
You can see your saved profile name in a print profile box.
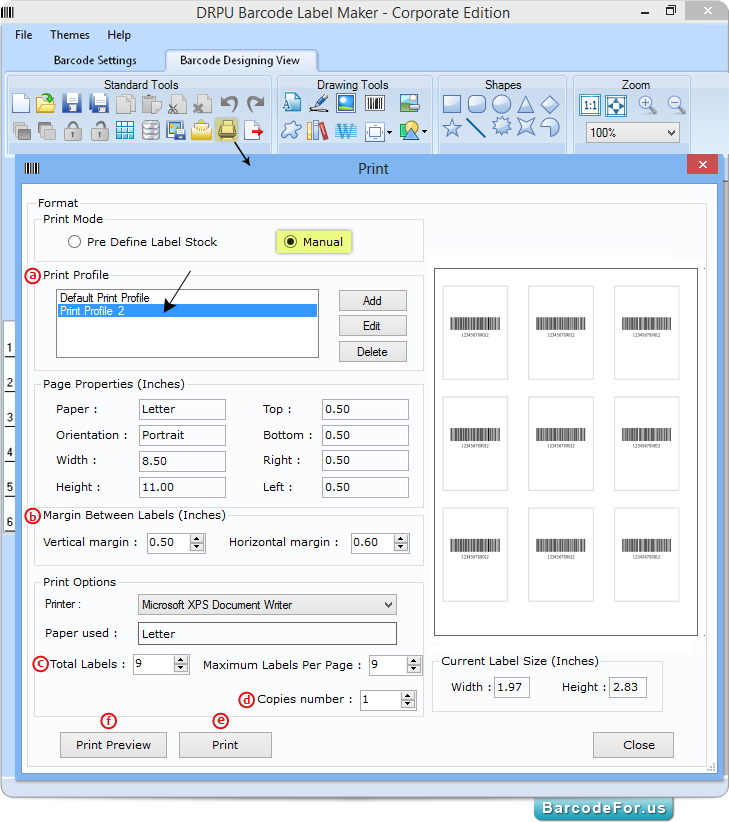
Now, set other options including -
a Select print profile (which you have saved),.
b Adjust margin between labels (Vertical and Horizontal) as per required.
c Select Total label on page.
d Set number of copies.
e Then press “Print” button to start printing process.
Note - f Print Preview option is available to see preview of print settings before starting actual printing process.


