

Custom Print Settings Screenshots
Barcode generator – Corporate Edition allows you to design barcode labels any of the following designing method –
A. Barcode Settings, B. Barcode Designing View
Now print your designed barcode label using either Pre Define Label Stock or Manual printing mode.
If you want to save your own print settings, Pre define Label Stock mode have Custom option which allows you to set various print settings and save it for future usage.
Here we are demonstrating how to set and save custom settings.
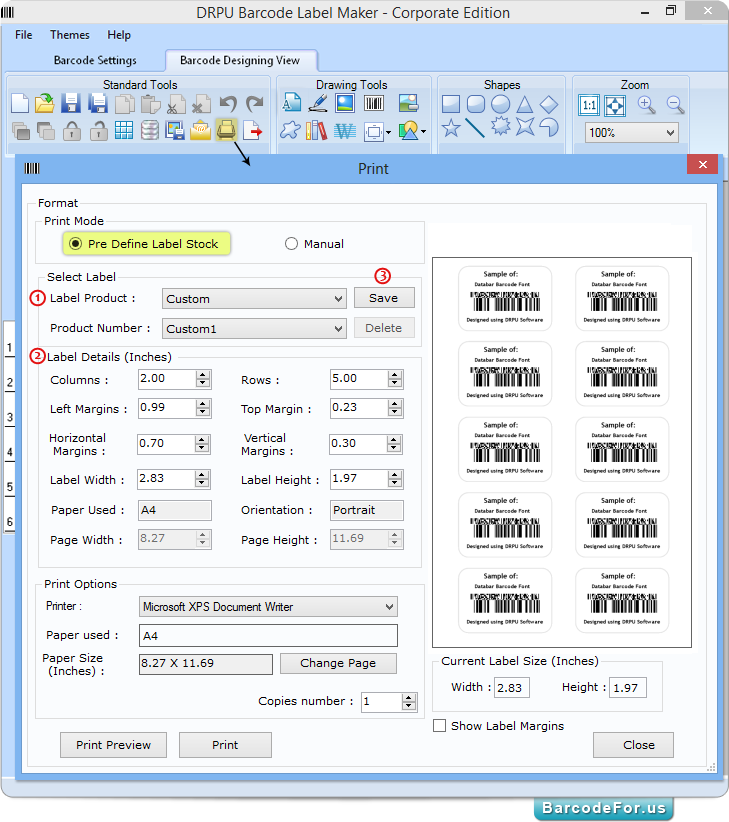
Click on print icon from standard tool bar, following print window will be displayed.

Select Pre define Label Stockprint mode and follow below steps -
1 Choose Label product as Custom.
2 Set Label details according to labeling need.
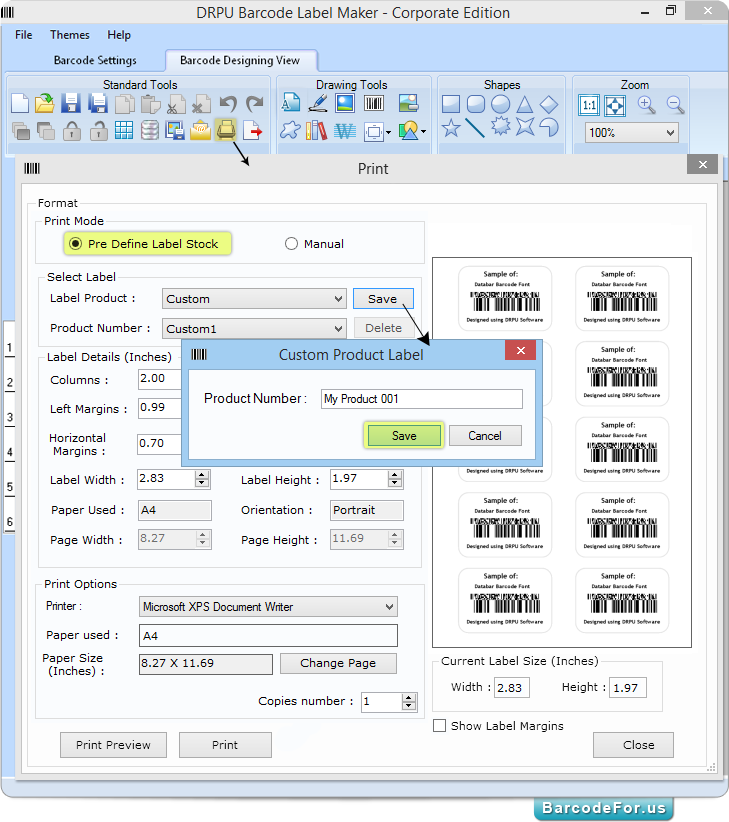
3 Click on “Save” button to save settings.

Enter Product Number and then press “Save” button.

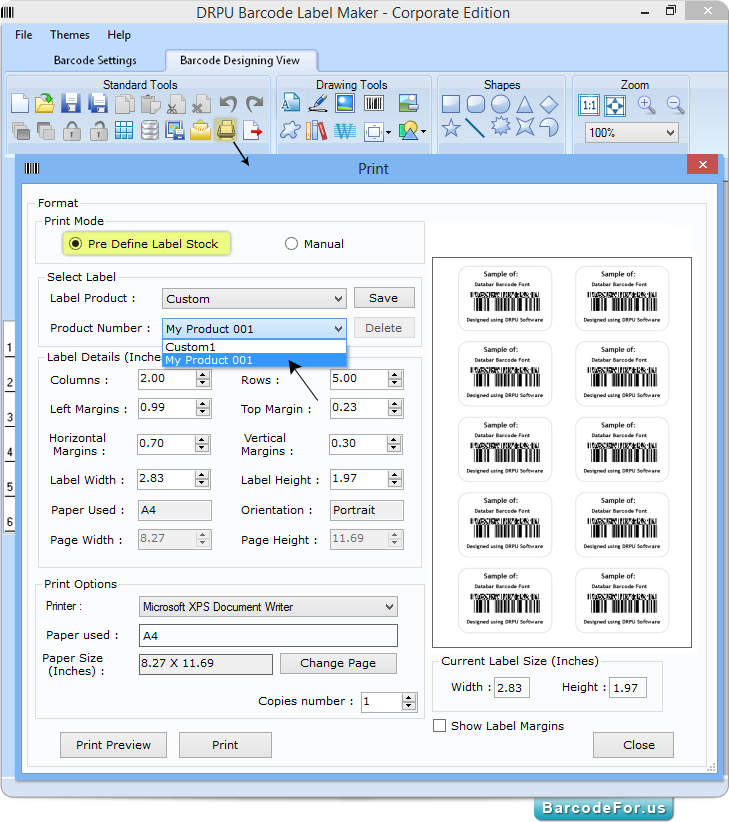
Here, in above screenshot you can see that your saved name is added as product number.
Now set printer as required
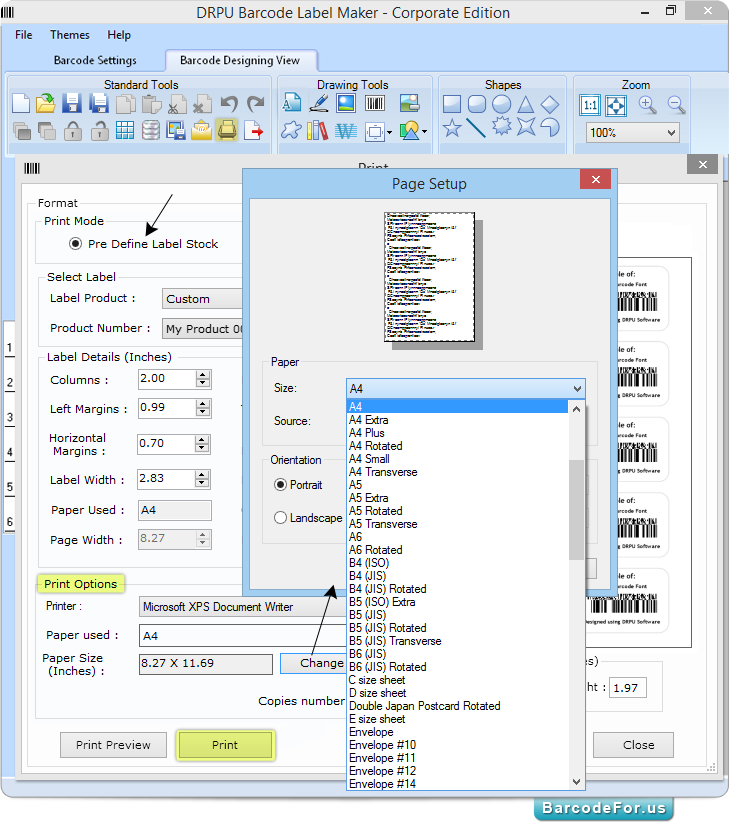
You can change your page settings, click on “Change Page” button, following page setup window will appeared.

In page setup window, you can choose page size (A4, Letter etc.), set Orientation (Portrait or Landscape) and then click on “OK” button.
Once you set all your print settings, press “Print” button.
Note – If you need to see preview before final printing, click on “Print Preview” button.


