


Barcode Settings Screenshots
There are two designing panel in Barcode Generator – Corporate Edition.
1 Barcode Settings panel
2 Barcode Designing View panel
Here we are going to discuss about how to design barcode images using barcode settings panel of barcode generator – corporate edition.
Barcode Settings panel has following features –
a Save barcode logs – You can save barcode log for further usage.
b Copy barcode – Software provides facility to copy barcode and paste it in MS-word, MS-paint etc.
c Export Barcode – You can also Export barcode and use it in any MS application.
d E-mail settngs – with E-mail Settings option, send your designed barcode via Email ID.
e Print settings – Print barcode Using either Pre Define Label Stock or Manual printing mode.
f Batch processing – In barcode settings batch processing, you can Create List, Import List and Export List of barcodes.
There are following settings in barcode settings method to design barcode images.
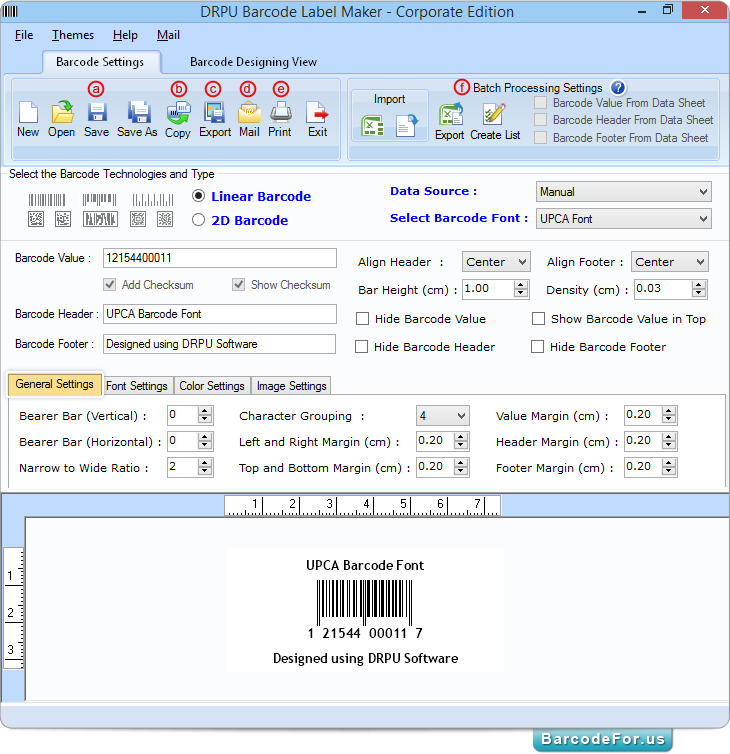
First select barcode technologies and type (e.g. Linear barcode and UPCA font). Now enter barcode value as per your industry requirement. You can also add barcode header and barcode footer accordingly. Software provides option to hide barcode header, footer and value if required, and also set header/footer align, bar height and density according to need.
Using General settings tab, you can set bearer bar, narrow to wide ratio, and set various margin including value margin, left and right margin, header margin etc.
If you want to change font of barcode value, header and footer then select Font settings tab as shown in below screenshot.
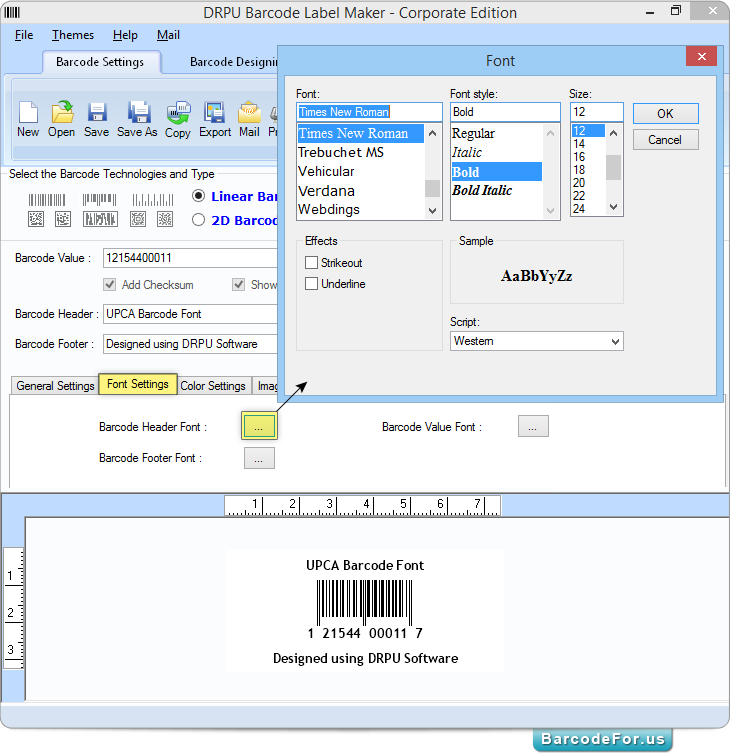
Using Font Settings tab, software provides an option to set font, font style and font size of barcode header, barcode footer and barcode value.
Software allows you to specify color using color settings option.
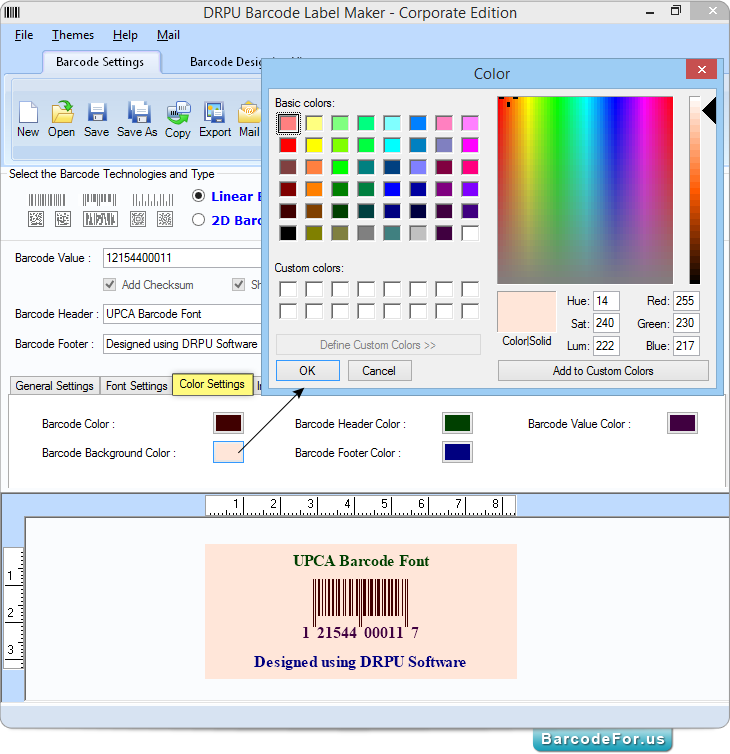
If you need to design color barcode, barcode generator software provides facility to change barcode color, barcode background color, barcode header color, barcode footer color and barcode value color as per your choice.
Note – Before designing colored barcode, make sure that combination of created colored barcode is scannable or non-scannable.
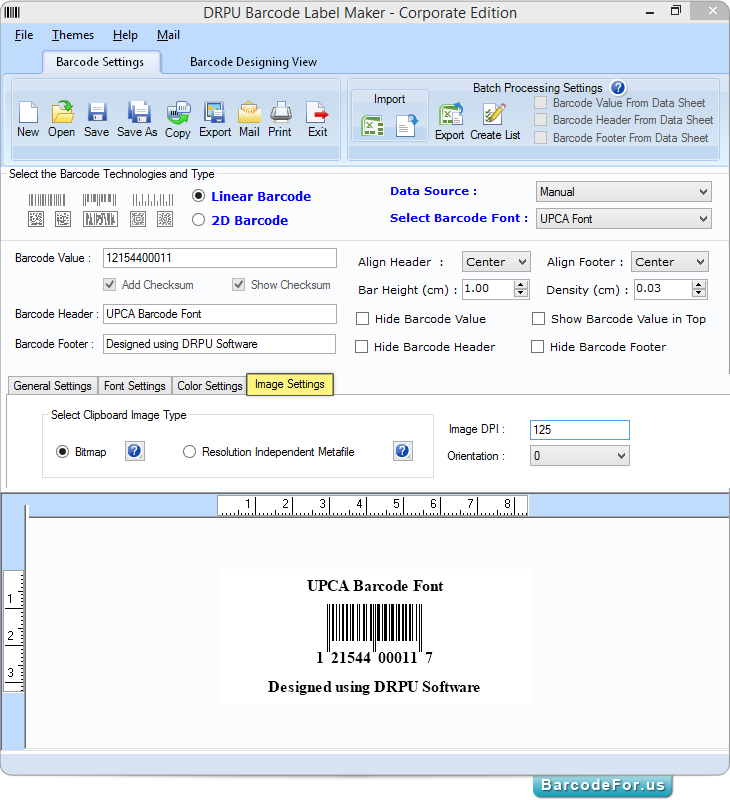
In image settings tab, you can select clipboard image type such as Bitmap or resolution independent metafile. You can also change orientation of barcode.
Note – If you are using Bitmap image type, you can set image DIP as per choice. This option is not available if you choose resolution independent metafile image type.
Once you design barcode image accordingly. Now you have an option to print your designed barcode.
Click on “Print” icon from tool bar, following print window will be displayed.
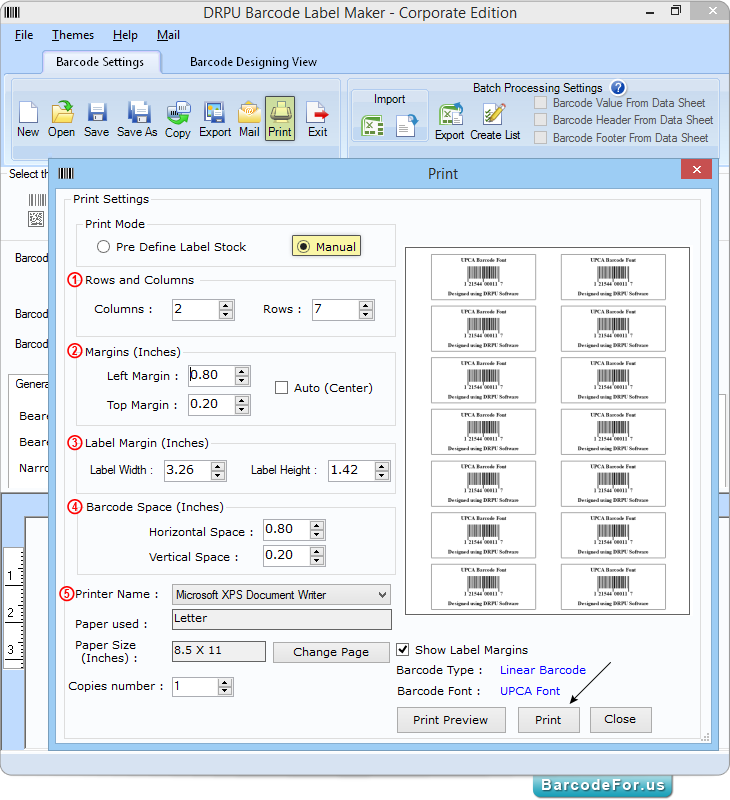
Select printing mode either Pre Define Label Stock or Manual.
Here we are choosing Manual print mode.
In manual print mode,
1 Set Rows and Columns
2 Specify left and top margin, you also have an option to auto center barcode image.
3 Adjust label margin (Label width and Label Height).
4 Set barcode horizontal Space and Vertical space accordingly.
5 Set printer and other printing options
And press “Print” button to start actual printing process.


