


Barcode Designing View Screenshots
Corporate edition of barcode generator software helps you to design printable barcode. There are two methods of designing barcodes via barcode generator –
2 Barcode Designing View
Here we are explaining step by step process about how to design barcode using barcode designing view method.
There are various tools available in barcode designing View panel, which you can use for designing your barcode labels according to business requirement including -
⇒ Standard Tools - There are various options in standard tools like New, Open, Save barcode logs, Grid, Batch Processing series, Export barcode, Mail, Print and Exit.
⇒ Drawing Tools - Such as Text, Signature, Picture, Watermark, Custom Shapes, Library image etc.
⇒ Shapes- You can use different shapes like Rectangle, Rounded Rectangle, Circle, Triangle, Diamond, star, line etc.
⇒ Zoom - Option to view card as Zoom in, Zoom out, fit to window and actual size.
First design your card using card properties. Card properties has following tabs as shown in below screenshot -
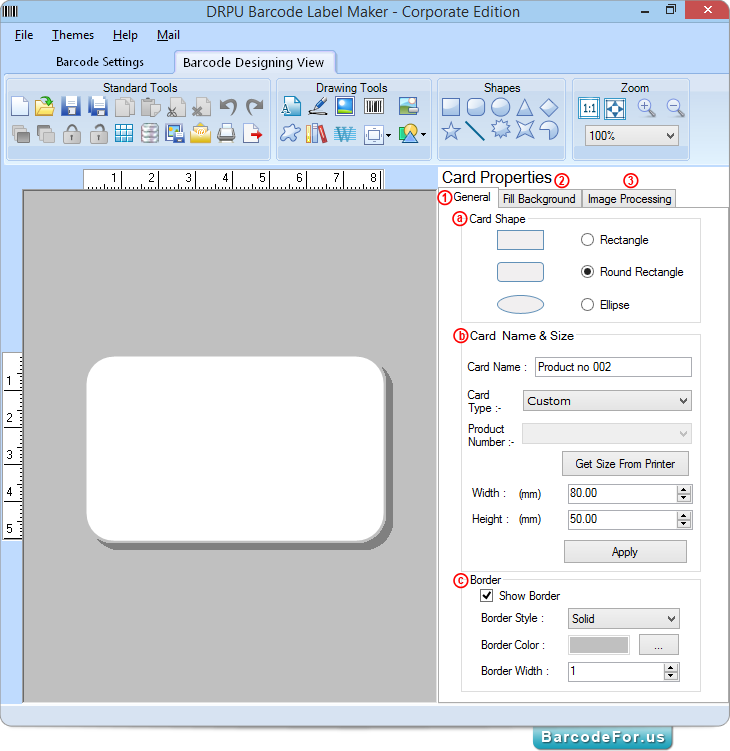
1 General – Shape your card by specifying a Card Shape (Rectangle, Rounded Rectangle or Ellipse), b Card Name ad Size (Width and Height) and c set border.
2 Fill Background – Specify card color, gradient, style and image as background.
3 Image Processing – Set Brightness, Contrast, hue etc. of card.
You can enter text on your card, click on text icon from drawing tools and then set text properties as shown in below screenshot.
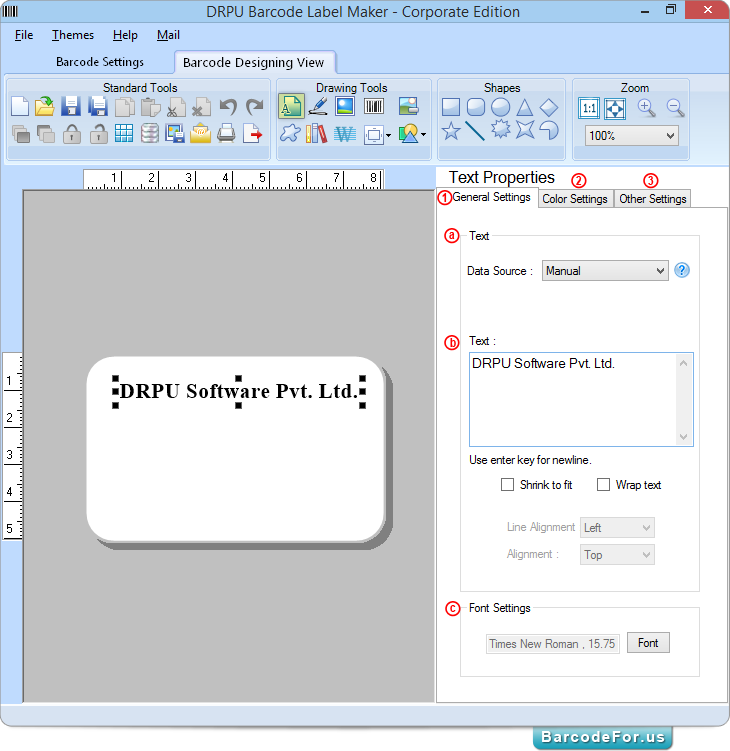
Adjust various text settings –
1 General Settings - Choose a data source (Manual or batch processing series), b enter text (which you want to write on card) and c set font, font size and font style.
2 Color Settings – Change fore color and back color of text.
4 Other Settings – Option to rotate angle of text and show frame (if needed).
Now add barcode on your card by clicking on barcode icon from drawing tool. Double click on inserted default barcode, following window will be appeared.
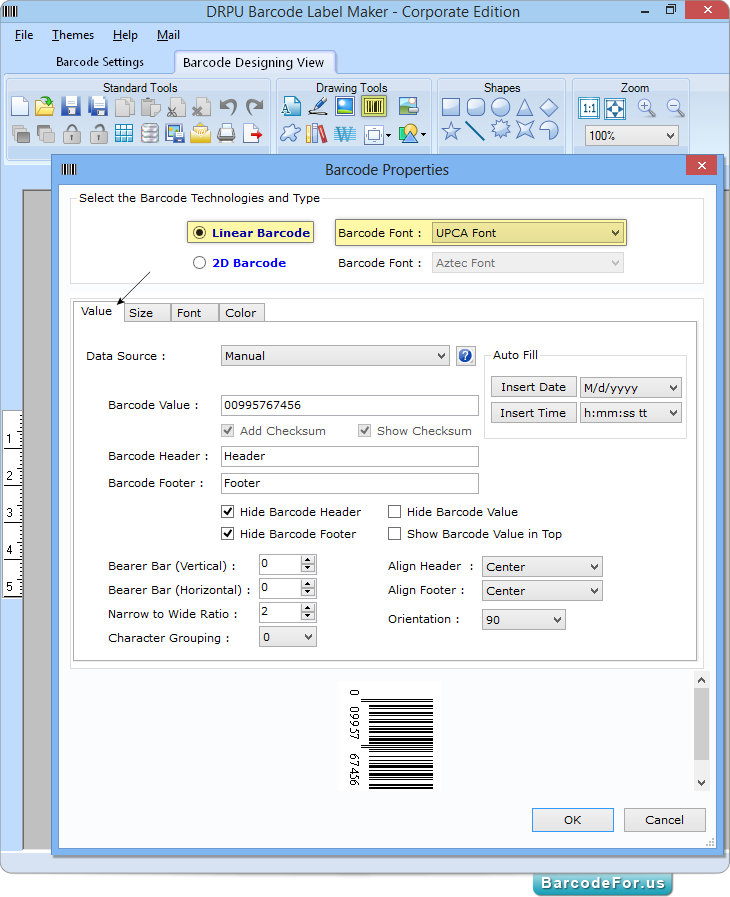
First select barcode technologies and type (e.g linear and UPCA) according to business requirement. Then set various barcode properties using different tabs.
Value tab - Select Data Source (manual or Batch Processing Series) and then enter barcode value with barcode header and footer in needed. You also have an option to hide barcode value, header and footer. Set bearer bar (vertical and horizontal), align (header and footer), narrow to wide ratio, character grouping and orientation.
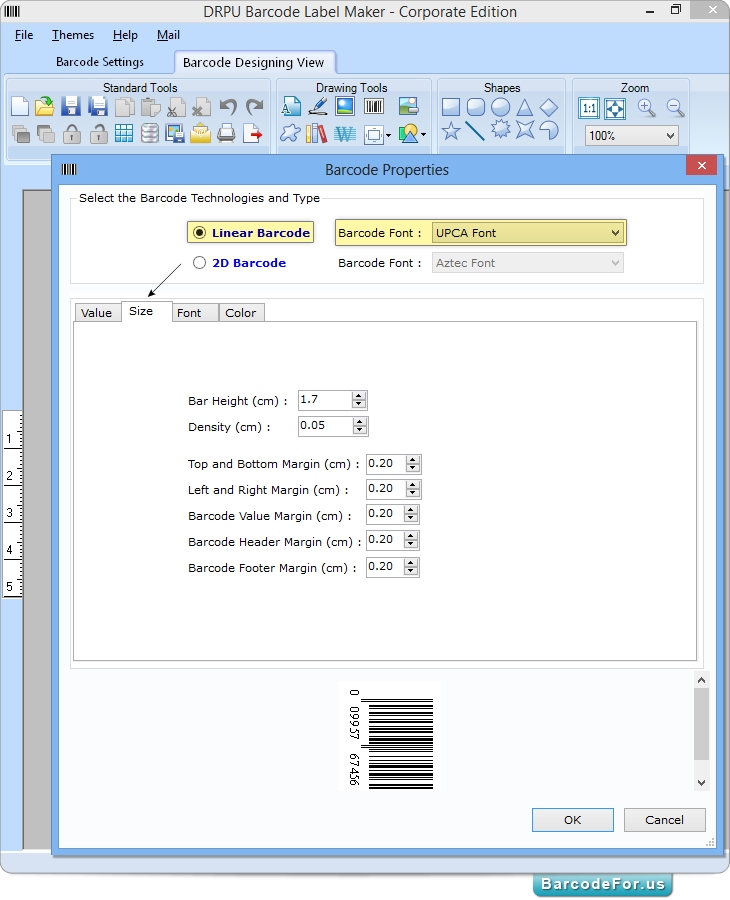
Here you can set bar height, density and various margin including top and bottom, left and right, barcode value, barcode header and barcode footer.
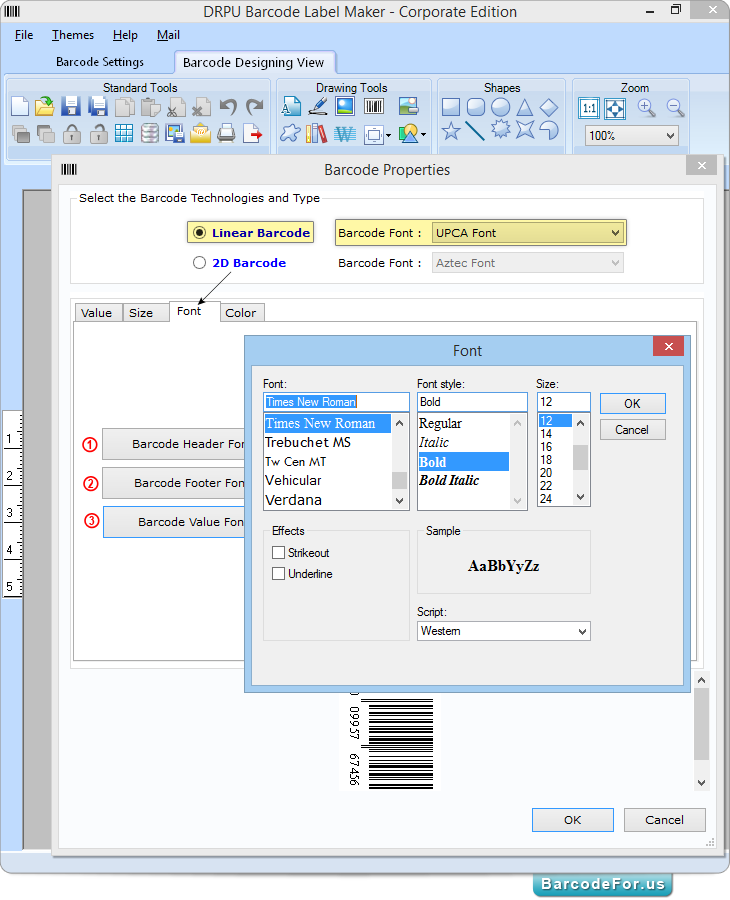
Using font tab, You can set -
1 Barcode Header Font
2 Barcode Footer Font
3 Barcode Value Font
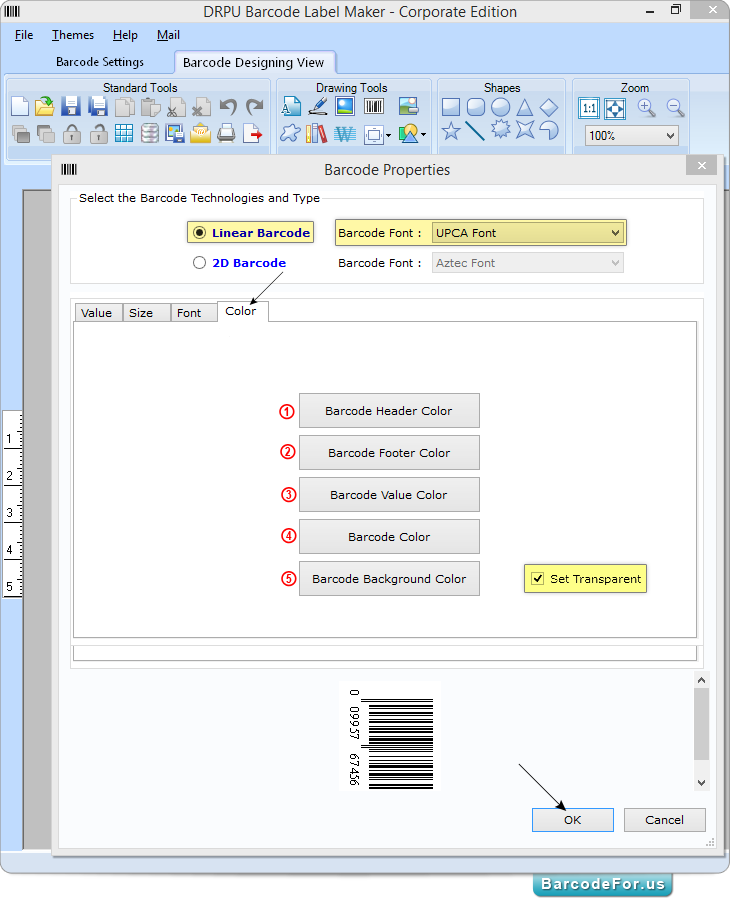
Using font tab, You can set -
1 Barcode Header Color
2 Barcode Footer Color
3 Barcode Value Color
4 Barcode Color
5 Barcode Background Color
Here you have an option to set transparency using “Set Transparent” option.
Then click on “OK” button to apply property on barcode.
After designing barcode label accordingly, now you can print designed label with advance print settings.
You can print your created barcode label using any of the following printing mode – Pre Define Label Stock or Manual.
Here we are going to print designed barcode using Manual print mode of barcode designing view.
Click on Print icon from standard tools, following window will be displayed –
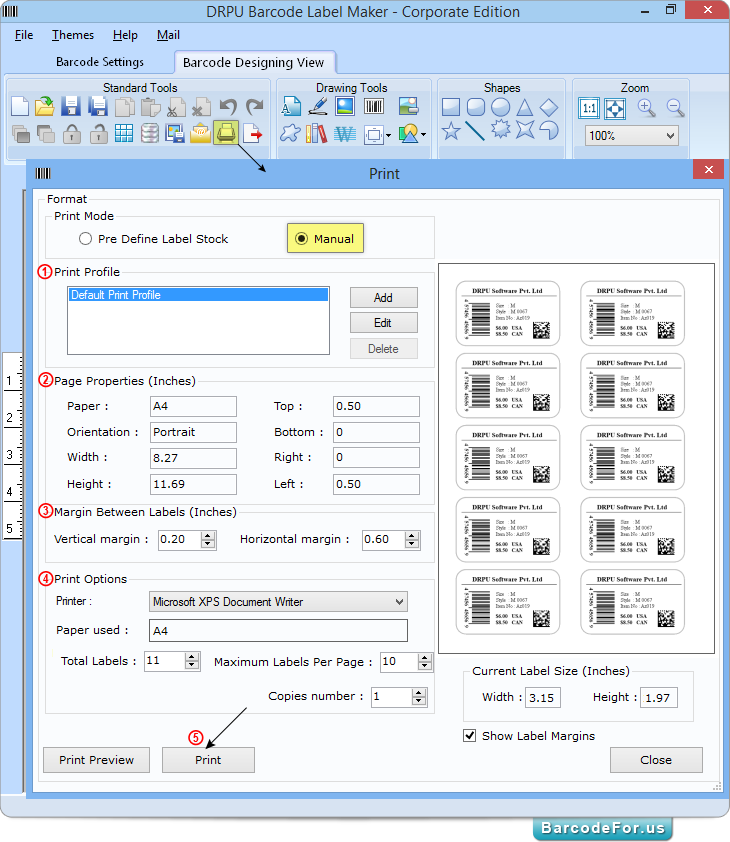
In manual print mode
1 Set Print Profile
2 Set page properties using Add or Edit button
3 Adjust margin between space (vertical a nd horizontal)
4 Set other print options
5 Then click on “Print” button to start printing process.
Note – Press “Print Preview” button, if you want to see preview before actual printing.
Note – In pre define label stock print mode, Select pre defined Label product with product number and set printer then press print button to print designed barcode label.


