Barcode Generator for Healthcare Industry Screenshots
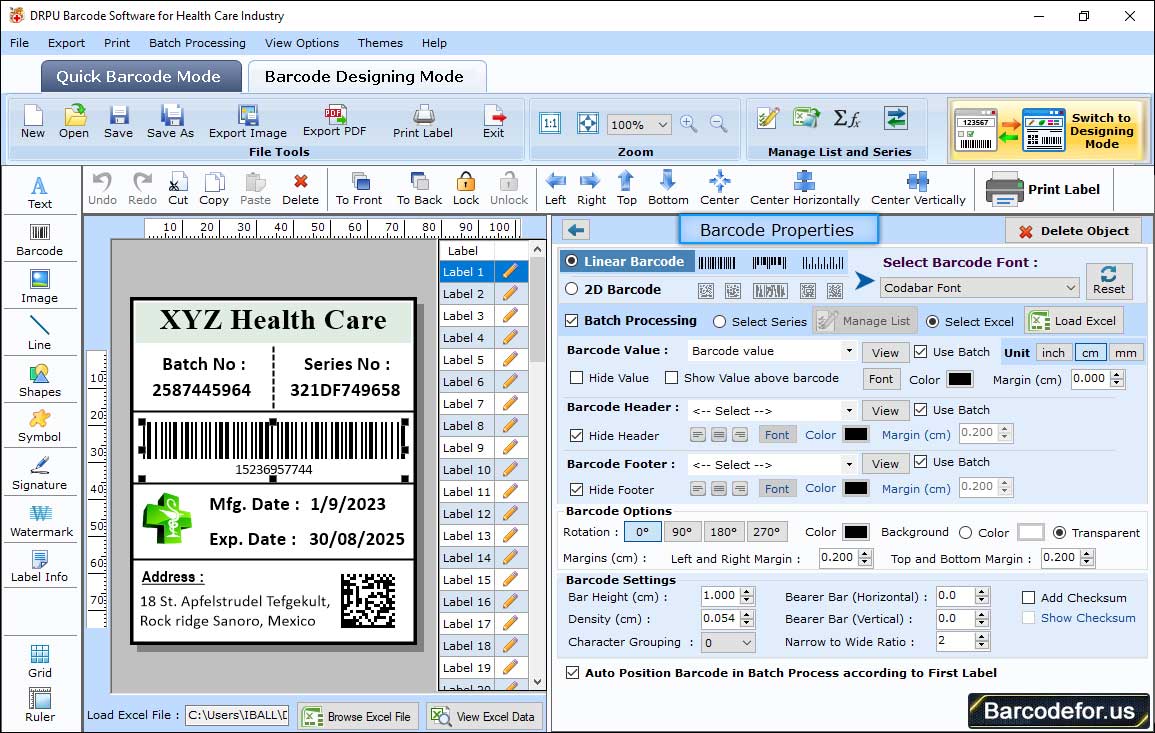
Click on barcode icon from drawing tools to add barcode on label. To work with its property, double click on barcode, following window will be displayed.

Select barcode technologies and type (e.g. Linear barcode and Codabar Font). Then specify different settings like value, size, font and color using corresponding tabs.
1 Value Tab - Enter barcode value, header, footer, align, orientation, narrow to wide ratio, character grouping etc accordingly. You also have an option to hide barcode header, footer and value.
2 Size Tab – Specify bar height, density and different margins as per requirement.
3 Font Tab – Set font, font style and font size of barcode value, header and footer.
4 Color Tab – If you need to change barcode color, barcode background color, barcode header, footer and value color, you can change it using color tab.

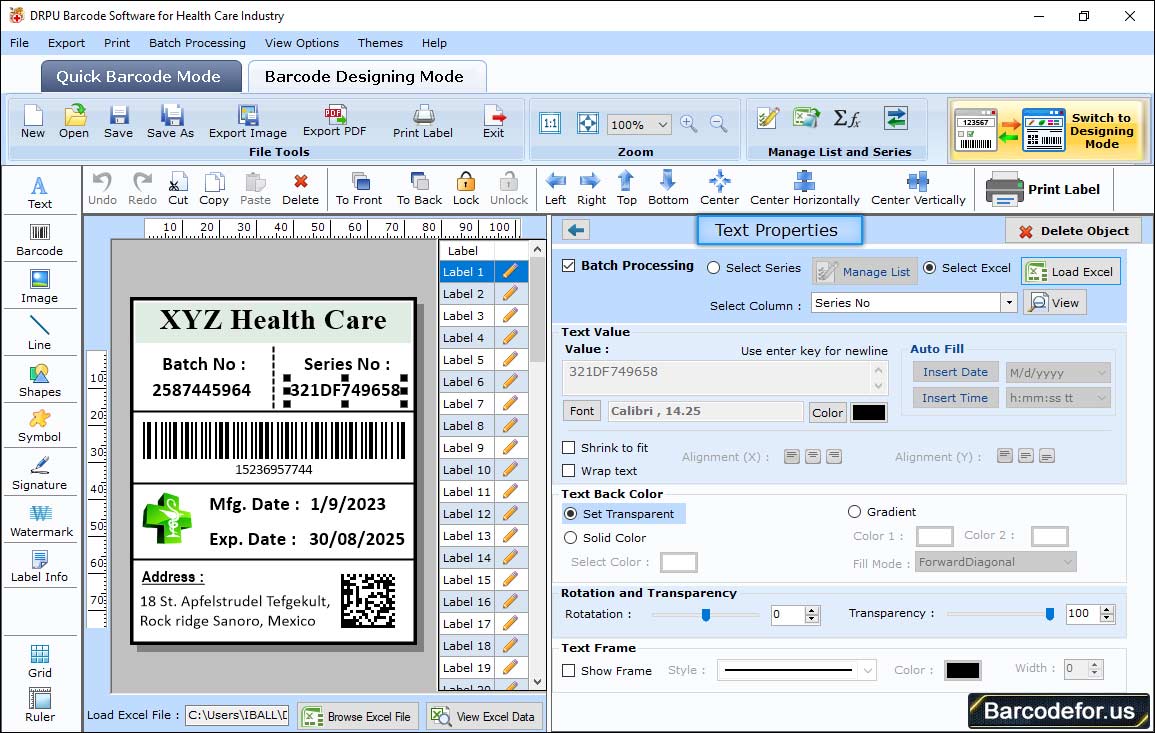
If you need to add text on label, click on Text icon from drawing tools.
Text Properties has following settings including –
1 Text Value – In Text Value, you can enter text number, text font and color which you want to write .
2 Text Background – You can also change color of text and text background.
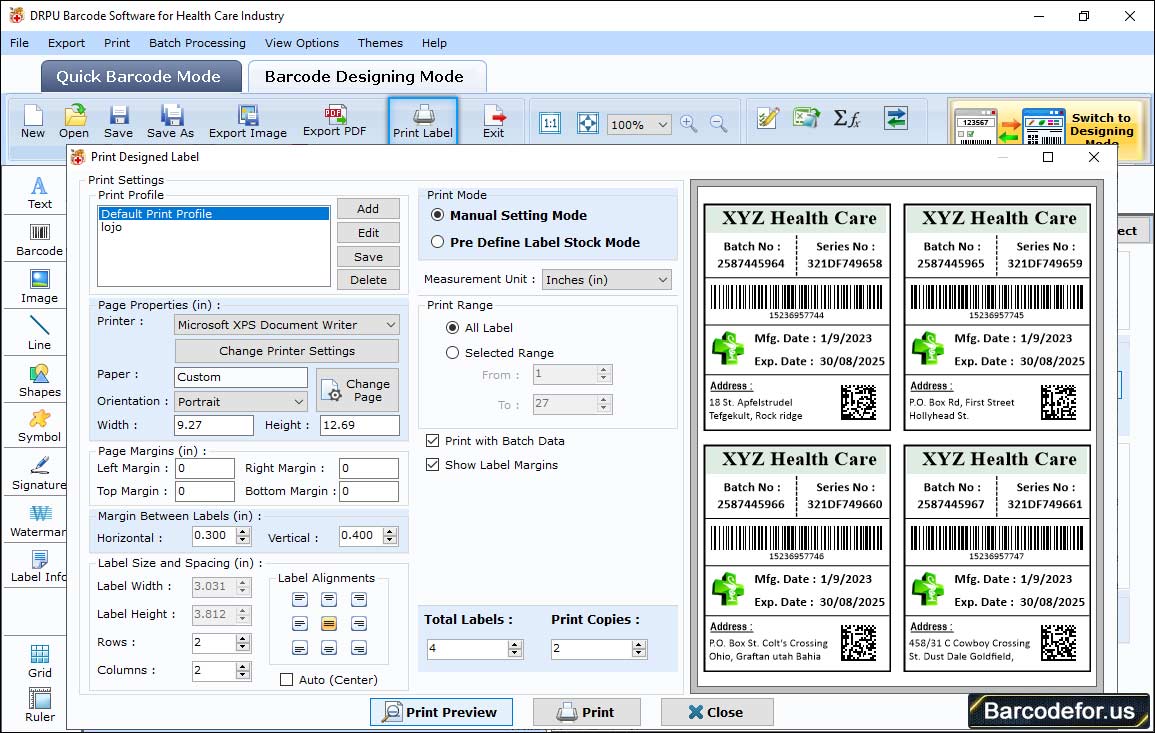
After designing your healthcare barcode label, print it using print settings. Click on print icon from standard tools, following print window will be shown.

Select printing mode - Either Pre Define Label Stock or Manual
If you choose manual print mode, you can set -
1 Print Profile,
2 Page Properties using add or Edit button,
3 Adjust margin between labels and
4 Select printer manually according to your need.
Then click on 5 “Print” button to start printing process.


